Piping Fabrication

Novelty Steel Is An Experienced Manufacturer of Piping Fabrication for Both Carbon Steel and Stainless Steel Applications.

A piping system, similar to a network of arteries, is essential for the movement of process fluid within a plant. It links various pieces of equipment needed for refining products.

Table of Contents

1. Introduction

To manage the flow and change its direction, pipes are joined with various components, valves, and process equipment, forming a complete system. The piping engineer has a range of choices for selecting the appropriate jointing methods for a specific process piping system. Some joints within a piping system are;

  • Flanged—using weld neck, socket weld, screwed, lap joint flanges.
  • Butt weld—using a full-penetration weld.
  • Socket weld—using a fillet weld with socket weld couplings.
  • Screwed—using screwed couplings.
  • Hubbed connections—using propriety hubs and collars.
  • Mechanical coupling—victaullic-type couplings.
  • Soldered

All methods for connecting pipes have potential for leaks, so it’s crucial to carefully choose materials and inspection levels to minimize in-service fluid loss. The type of joint must be leak-proof for the plant’s entire lifespan. Factors to consider include:

  1. Process fluid type, including its toxicity and viscosity.
  2. Design temperature range.
  3. Design pressure.
  4. Mechanical strength of the base material, such as tensile strength and yield capacity.
  5. Size and weight of the components.
  6. Risks of erosion and corrosion.
  7. Whether the joint is for permanent or temporary use, and if a quick release is needed.
  8. Quality of labor available.
  9. Costs involved.
  10. Maintainability and reliability of the joint.
  11. Expected plant life.
  12. Ability to handle vibration.
  13. Potential external impacts from people, vehicles, etc.
  14. Ease of fabrication or erection.
  15. Availability of necessary materials and components.

Although the checklist for selecting pipe jointing materials is extensive, the first four points often immediately disqualify many materials. Furthermore, many piping systems utilize various types of pipe jointing to meet the specific needs of the plant.

2. Joint Selection for Piping

2.1 Type of Process Fluid

Below are the 3 main types of fluid that are transported;

  • Hazardous process—see ASME 31.3, Category M.
  • Non-hazardous process—see ASME B31.3, normal fluid service (NFS).
  • Utility service—see ASME 31.3, Category D

For process fluids like ammonia and concentrated acids, which are hazardous, even minor leakages pose significant risks to personnel and the plant. In such cases, the most efficient piping joint is prioritized over cost considerations. The preferred choice in these cases is a butt weld since it is the most reliable option with the lowest likelihood of failure. This reliability is further improved by implementing a strict inspection regime.

2.2 Pressure and Temperature

  • Flanged joints have the lowest integrity among pipe joints and are used to establish the upper design limit of a piping system. According to the ASME B16.5 standard for steel flanges, there are specified maximum allowable internal design pressures for different materials in a given piping class at various temperatures. The allowable internal pressure decreases as the temperature rises.
  • Butt weld joints have the highest integrity among pipe joints. A full penetration butt weld that has been inspected using ultrasonic (UT) is often considered guaranteed to be leak proof. Other non-destructive examination (NDE) methods like magnetic particle examination (MPE) or liquid penetration examination (LPE), are coming next after UT in terms of reliability.
  • Piping systems that transport toxic fluids or operate under extremely high pressures and temperatures undergo 100% UT. For piping systems transporting toxic fluids, high-integrity pipe joints such as butt welds are required due to their superior reliability.
  • The NDE is performed prior to the hydrostatic testing of a piping fabrication. Once a hydro test is successfully completed at 1.5 times the design pressure, all welds are deemed to have the highest integrity.
  • Socket weld connections, though not full penetration welds, are considered suitable for handling process fluid by most operators. For additional assurance, these can also be subjected to NDE methods such as RT, MPE, or LPE. However, careful attention is required for the fit-up of socket weld connections. It’s important to leave a gap at the bottom of the female socket to avoid ‘bottoming’ during welding, when heat causes metal expansion.
  • Screwed connections are not advised for conditions involving both high temperature and high pressure, or where there is vibration. While capable of containing medium to high pressure, their lower integrity leads many operators to limit their use to utility piping systems like air, water, and nitrogen lines.

2.3 Material Compatibility

The material chosen for a pipe joint must be both mechanically and chemically compatible with the pipe that transports the fluid. In cases where welding is necessary, the materials to be joined must also be chemically compatible to ensure a proper weld. Additionally, the joint’s material must have corrosion resistance characteristics very similar to the parent pipe, considering both the internal fluid and the external environment.

In industries like food and pharmaceuticals, the jointing material must be selected such that it does not contaminate the process fluid.

Welding materials with differing chemical compositions is feasible, provided that there is no risk of galvanic corrosion. This requires a correct welding procedure and execution by a qualified technician to ensure the integrity and safety of the joint.

2.4 Dimension

The choice of joints can be influenced by the outside diameter of the pipe. Screwed fittings, for example, can be utilized in diameters up to 4 inches (100 DN), but in practice, they are seldom used beyond 2 inches (50 DN). Socket weld fittings are generally employed only in diameters up to 2 inches (50 DN). On the other hand, butt-welded and flanged joints offer greater flexibility and can be used in a wide range of diameters, starting from 1⁄2 inch (13 DN) and extending as high as it is feasibly possible.

2.5 Corrosion

When connected, screwed pipe joints can create small crevices which is not advisable for certain process fluids under extreme pressure or temperature conditions. Over time, these crevices can accelerate corrosion which diminishes the efficiency of the joint and potentially causing in-service failure. Additionally, external corrosion from environmental factors such as hot conditions in the desert, cold conditions in Alaska, or wet conditions in marine environments must be taken into consideration. This underscores the importance of selecting appropriate jointing methods that minimize the risk of corrosion and ensure the long-term integrity of the piping fabrication.

2.6 Connection Type

When connecting a piece of pipe to a valve or equipment, and there’s a possibility that the joint might need to be broken to remove the item, a flanged joint or a mechanical coupling should be used. A welded joint is not suitable in this scenario as it is permanent connection. Valves designed for top entry, allowing repairs and maintenance in situ, may be fully welded into the line if they don’t require removal.

However, in situations where pipe connections are regularly broken, such as flexible hose connections to hard pipe, it’s recommended to use quick-release alternatives to facilitate easier and more frequent disconnection and reconnection.

2.7 Maintenance

The maintenance of butt welds, socket welds, and screwed connections is typically unnecessary unless a joint failure occurs. In contrast, temporary flanged joints requires a replacement of gaskets each time the joint is disassembled. If such disassembly is frequent, it may also require the replacement of bolting.

3. Piping Fabrication Welded Joints

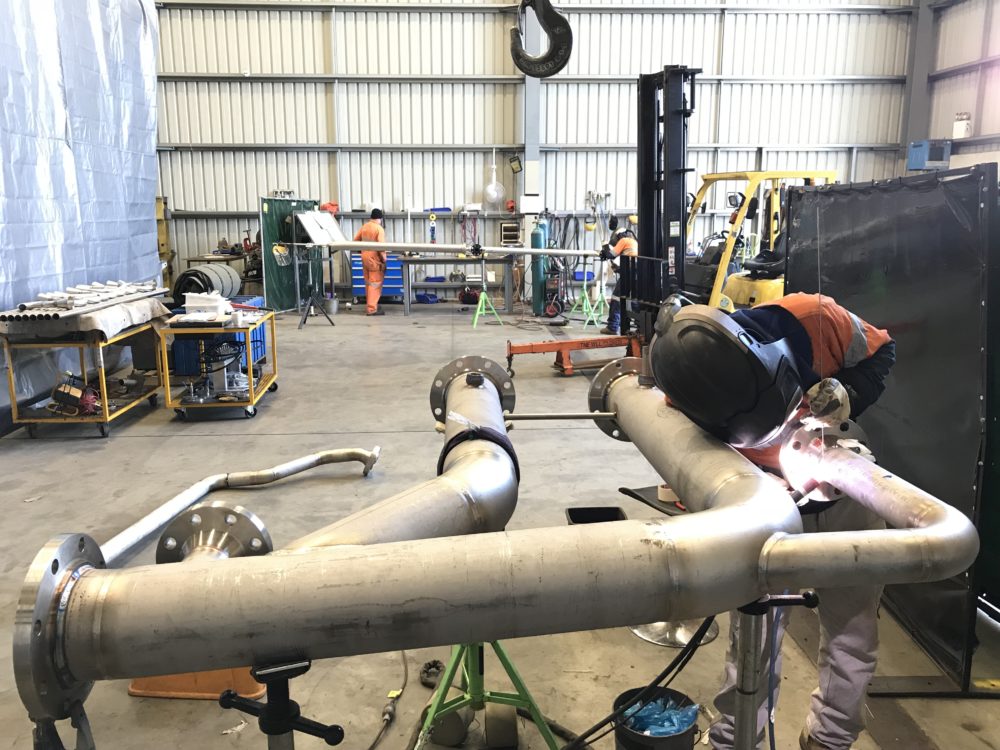
Welding provides a cost-effective means of joining metallic components, including pipe to pipe, pipe to fitting, or fitting to fitting, in order to establish a reliable pressure seal. Inspection of this joint can be conducted through non-destructive examination (NDE), and it can undergo hydrostatic testing to meet applicable codes and standards.

3.1 Welding Stainless Steel Pipes

The corrosion-resistant properties of stainless steel are attributed to the presence of chromium in quantities over 12% by weight. This chromium level ensures the formation of a continuous and stable protective layer. Stainless steel is classified into three main groups: austenitic (300 series), ferritic, martensitic (400 series), and ferritic-austenitic (duplex).

Two primary methods of metallic welding, butt welding and socket welding, are used to connect straight lengths of steel pipe, pipe to fitting, or fitting to fitting. Each method has its own set of advantages and disadvantages, as outlined in the below Table 1.

Comparison of Butt Weld and Socket Weld

Table 1 :Comparison of Butt Weld and Socket Weld

3.2 Butt Weld

A butt weld joint is created by aligning two pieces of pipe or fittings with matching bevelled ends. Both ends are secured firmly in position and they are welded together according to a specific welding procedure. The welding procedure specification (WPS) includes various parameters such as;

  • pipe material
  • diameter and wall thickness
  • joint preparation
  • pipe position (vertical or horizontal)
  • back purging gas if applicable
  • preheating and interpass temperatures
  • welding process type
  • flux and shielding gas
  • electrode and filler material
  • gas flow rate and nozzle details
  • welding current (ac, dc, polarity)
  • postweld heat treatment
  • welder identification.

There are three types of butt welds;

  • full penetration
  • with a backing ring
  • with a fusible backing ring.

The most prevalent in the oil and gas industry is the full-penetration butt weld without a backing ring. When performed by qualified personnel following the correct WPS, this type of weld ensures high-integrity and pressure-retaining characteristics which makes it suitable for non-destructive examination (NDE) for added assurance.

3.2 Socket Weld

To connect two square-cut pieces of pipe, a socket weld coupling is necessary. This coupling enables the insertion of the two pipe lengths into the ends of the fitting, with two circumferential fillet welds then being completed. A root gap of approximately 1.5 mm is essential to accommodate the lateral expansion of the pipe when heat is applied during the welding process. The presence of this gap prevents ‘bottoming,’ a situation where the pipe expands and presses against the base of the socket. Omitting the gap can lead to unnecessary force applied to the joint during welding.

Socket-weld joints are cost-effective for sizes up to approximately 2 inches (50 mm). Beyond this size, the more structurally sound butt weld becomes viable option. When employing the socket-weld method to join two pieces of pipe, two fillet welds and a full coupling are required. In contrast, the butt-weld method involves only one full-penetration weld without the need for additional fittings which results in a higher-integrity weld.

4. Piping Welding Techniques

For the piping fabrication there are three methods of applying a weld. The manual welding method is typically employed for both shop and on-site work. In contrast, semi-automatic and automatic methods are utilized for their repetitive processes, making them well-suited for fabrication shops where conditions can be more effectively controlled.

Welding methods of piping systems

Table 2: Welding methods of piping systems

4.1 Metal Arc

Metal-arc welding, also known as stick welding involves creating an arc between a consumable metal rod (electrode) and the parent metal (work piece and the metal pieces to be welded). Heat generated melts the parent metal and part of the electrode, resulting in a weld metal composed of both materials. To prevent the formation of weakening oxides in the weld, the electrodes are coated. This coating creating a slag that shields the weld during cooling and prevents atmospheric contamination.

This method is widely used for smaller fillet welds due to its simplicity and cost-effectiveness. However, it is not suitable for larger fillet welds and butt welds, which require multiple passes.

Metal arc welding requires a power source, a consumable electrode in a holder and a struck arc. The sustained arc intensity can lead to “burning through” when welding thinner steel sections under 1.5 mm. For pipe sections below 1.5 mm, TIG welding or oxyacetylene welding should be used. The slag produced during metal arc welding must be removed from the weld bead after welding.

In cases where penetration is challenging, combining multiple welding methods is an option. For butt welding small, thick-walled pipes, satisfactory results can be achieved by using TIG welding for the initial run and completing the rest of the weld with the more economical metal arc method.

4.2 Oxyacetylene Welding

In oxyacetylene welding, a blowpipe is used to feed oxygen and acetylene, and these mixed gases are burned simultaneously at the tip, producing an intensely hot flame. This flame is employed to heat and melt the edges of the work pieces and the filler rod, which is then deposited in the molten pool to create the weld metal.

The filler rod is typically composed of the same material as the work piece, providing additional mass to form the joint. Flux is usually not required for oxyacetylene welding, but if used, it can be applied as a paste on the work piece edges or coated on the filler rods.

piping oxyacetylene welding

The temperature of an oxyacetylene flame is lower than that of an arc which makes it suitable for thinner metal sections. However, this lower temperature also means that there may be a risk of insufficient fusion between the weld and the work piece.

4.3 Submerged Arc Welding

Submerged arc welding (SAW) is a welding process known for its high quality and exceptionally high deposition rates. In this method, a granular flux is utilized, forming a thick layer that serves to prevent sparks and splatter while acting as a thermal insulator, facilitating deeper heat penetration. Submerged arc welding offers remarkable weld productivity, approximately 4–10 times more than shielded metal arc welding (SMAW).

4.4 Tungsten Inert Gas (TIG) Welding

Tungsten inert gas (TIG) welding is a high-quality welding process that has the following components:

  1. A power supply.
  2. A non-consumable electrode, usually made of tungsten.
  3. An inert gas supply, commonly argon or helium.
  4. A filler rod, typically composed of material similar to the parent material.
  5. A struck arc.

The tungsten electrode is positioned centrally in a nozzle-shaped holder through which inert gas is passed at a controlled low velocity. This shields the weld area from atmospheric contamination.

Inert gas options include argon, argon/hydrogen, and argon/helium. Helium is often added to enhance heat input which increases welding speed. The addition of hydrogen results in a cleaner-looking weld but it may contribute to porosity or hydrogen cracking.

The heat generated by the arc melts the edges of the work pieces and the filler rod. This forms a molten pool that solidifies into the weld upon cooling. Due to the protective shielding of the weld area by the inert gas, there is no need for flux in this process. This is particularly advantageous when working with corrosion-resistant alloys (CRA) as effective fluxes can be corrosive. If a filler wire is required, it is introduced separately into the weld pool.

4.5 Metal Inert Gas Welding

Metal inert gas (MIG) welding is a high-quality welding process with a high deposition rate. This process involves an arc burning between a thin bare metal wire electrode and the work piece, with the welding zone shielded by an inert gas like argon, helium, carbon dioxide, or a gas mixture. The arc is self-adjusting, and changes in arc length made by the welder result in a corresponding burn rate adjustment.

Deoxidizers in the electrode prevent oxidization in the weld pool. This allows multiple weld layers. While similar to the TIG welding technique, MIG welding uses a consumable bare metal electrode of material similar to the work pieces. It a semi-automatic welding process with wire is continuously fed from a spool

Requirements for MIG welding include a power source, generator, a consumable electrode with a feed motor (usually tungsten), an inert gas supply (argon/helium), and a torch or gun. Similar to TIG welding, MIG welding does not require the addition of flux.

Various inert shielding gas options include argon, argon with 1–5% oxygen, argon with 3–25% CO2, and argon with helium. Pure CO2 can be used in some MIG welding processes but it may impact the mechanical properties of the weld. Due to the higher arc temperature, MIG welding can effectively weld materials with a thickness of 3 mm and above.

One advantage of MIG welding over TIG welding is its speed, being almost twice as quick.

5. Heat Treatment of Welded Piping Fabrication

Depending on the welding procedure, two additional heat treatment processes may be required to meet code requirements: preheating and post-weld heating.

  • Preheating involves applying heat to the work pieces before the welding process. This entails heating the work pieces to a specific temperature (as defined in standards like ASME B31.3) and then allowing them to cool.
  • Post-weld heating might be necessary to restore the original metallurgical structure or alleviate residual stresses caused by differential cooling. In certain cases, post-weld heat treatment is mandatory according to the code. Ideally, post-weld heat treatment is conducted in a furnace, providing precise control over temperature, temperature gradients, and cooling rate. However, there are situations where this is not feasible, and welds must undergo post-weld heat treatment in situ. In such cases, portable heating elements are utilized to achieve the required temperature conditions.

6.Non-Destructive Examination (NDE) of Piping Fabrication

Non-Destructive Examination ensures the integrity of completed welds so that their mechanical strength equal to or greater than the parent pipe. To mitigate the risk of failure, an inspection plan incorporating various non-destructive tests is essential. Non-destructive examination involves assessing a weld without causing physical damage or compromising its pressure-sealing capabilities. Various methods are available, each with different costs and levels of accuracy. Qualified personnel capable of interpreting results and taking appropriate action must conduct these examinations:

  1. Visual Inspection: For surface crack detection in all materials.
  2. Magnetic Particle Examination: For surface crack detection in carbon steel and other magnetic metals.
  3. Dye Penetrant Examination: For surface crack detection in nonmagnetic stainless steels and other nonmagnetic metals.
  4. Radiography: For surface and through-metal inspection.
  5. Ultrasonic Examination: For surface and through-metal inspection.

All non-destructive examinations of welds must occur before hydro testing of the piping fabrication and before painting or insulation. This allows for the repair and retesting of bare pipes in case a weld fails the examination before the painting or insulation processes take place.

Different piping systems require different types and levels of inspection based on factors such as service fluid, material, temperature, pressure, and location.

6.1 Visual Inspection

Visual inspection is the most straightforward and cost-effective method. It requires all welds to undergo this basic examination using either the naked eye or a magnifying glass to identify imperfections. A thorough cleaning of all surfaces prior to inspection is essential. This method is limited to detecting surface imperfections. If any imperfection identified, additional tests are then required to assess the extent of the flaw.

Even when a weld is scheduled for more accurate inspection methods, it is advisable to perform a visual examination. If visual inspection reveals imperfections, additional scrutiny can be intensified in the specific area of concern. This initial visual examination serves as a preliminary step to identify any noticeable issues that should be addressed for further examination.

6.2 Magnetic Particle Tests

Magnetic particle examination (MPE) is used to identify surface cracks in ferromagnetic materials, such as carbon steel. Austenitic-chromium stainless steel is weakly magnetic and is therefore not suitable for this type of examination. MPE is particularly effective in detecting fine cracks that may be invisible to the naked eye.

The examination process involves magnetizing the weld under analysis using an electromagnet. Subsequently, fine particles of a magnetic material, like iron or magnetic iron oxide, are applied to the surface. These magnetic particles are drawn to the edges of any surface cracks which makes them visible to the naked eye. This method is valuable for detecting minute cracks that might not be easily appear through visual inspection alone.

6.3 Liquid Penetrant Examination

The liquid penetrant examination (LPE) method is applied to nonmagnetic metals such as austenitic-chromium stainless steel. It requires applying a penetrating liquid containing a dye to the surface. The liquid is allowed time to infiltrate any surface flaws, and excess liquid is then removed. After drying, the weld is inspected, and flaws are revealed by the presence of visible dye, making them apparent to the naked eye. LPE is a useful method for detecting surface flaws in materials that are not susceptible to magnetic particle examination.

6.4 Radiography

Radiographic (RT) examination is a highly valuable non-destructive test. It is capable of detecting subsurface flaws that are invisible to the naked eye. Initially utilizing X-rays, modern pipe joints can now be examined using gamma-rays produced by portable radioactive isotopes. It’s important to note that all sources of radiation pose potential dangers and extended exposure must be avoided. Thus, technicians performing radiography must adhere to safety measures for personnel protection.

In the radiographic examination process, a film is placed on one side of the weld, while the weld on the other side is exposed to X-rays or gamma-rays. As the radiation passes through the weld, any imperfections, whether on the surface or subsurface, create a dark shadow on the exposed film. The absence of imperfections appears as a clear, uniformly shaded area. Potential defects that may be identified include;

  • cracks (both surface and subsurface)
  • subsurface cavities caused by oxide film
  • lack of fusion
  • trapped slag flux, or foreign material
  • gas pockets (porosity).

Each radiograph is recorded with the weld number for precise identification, and the names of the radiographer and inspector are also listed. Radiographs are subject to interpretation, which underlines the importance of personnel involved in this activity being appropriately qualified.

6.5 Ultrasonic

Ultrasonic (UT) waves, typically with a frequency ranging from 500 to 5000 kHz, are directed as a narrow beam toward a target. Upon reaching a metal surface with a flaw, the waves are reflected and then returned to a suitable receiver. The time taken for the echo to return serves as a measure of the length of the path covered by the waves.

Ultrasonic method can achieve accuracy comparable to radiography when performed correctly. One significant advantage of ultrasonic testing is the portability of the equipment. This makes UT particularly useful in situations where the weld is in a challenging location or requires on-site examination. The ability to bring the equipment to the weld site enhances flexibility and convenience in conducting inspections.

7. Flanged Joints in Piping

Joining two lengths of pipe through metallic flanged connections is a widely used method in piping fabrications. The essential components needed to create this connection include:

  1. Two Metal Flanges: These flanges can be made from various materials such as carbon steel, stainless steel, cast iron, Inconel, etc. The choice of material depends on factors like the nature of the transported fluid, temperature, and pressure conditions.
  2. One Set of Bolts: Bolts are used to secure the two flanges together. The material of the bolts can vary and may include carbon steel, low-alloy steel, stainless steel, etc.
  3. One Gasket: The gasket provides a sealing surface between the two flanges, preventing leakage. Gaskets come in various materials, including rubber, graphite, Teflon, spiral wound, and metal ring.

The metallic flanged connection involves two mating flange faces brought together by a set of equally spaced bolts, typically with a gasket sandwiched between them. In exceptional cases, a gasket may not be used.

The sealing in this joint is achieved by applying compressive force through the tightening of bolts against the two flanges, with the gasket trapped between them. While this method allows for the disassembly of the joint by loosening the bolts, it is not considered a permanent joint. However, in practical applications, such connections can remain in place for several years.

Flanges must have a specified facing, and the facing type can be one of the following:

  • Flat Face (FF): The surface is a flat machined face. It requires a full-faced gasket to establish the pressure seal.
  • Raised Face (RF): A flange with a raised step machined on the face. To create the pressure seal, a spiral-wound gasket is typically used.
  • Ring-Type Joint (RTJ): This flange has a circumferential groove machined into the face. It requires an oval or an octagonal circular ring gasket to establish the pressure seal.

7.1 Weld Neck Flanges

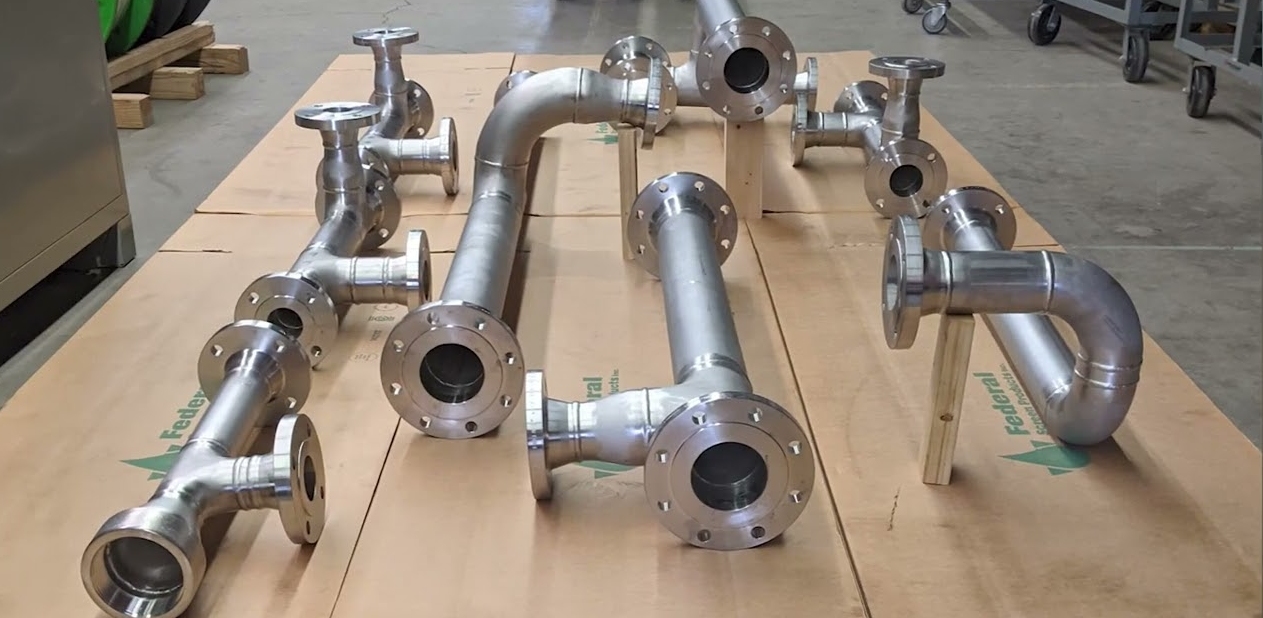
The dimensions and design of the weld neck flange are carefully calculated to comply with the requirements of relevant codes, such as ASME B16.5 or ASME B16.47. Essentially, the weld neck flange consists of a flanged blade with standard drilling for bolts. This is determined by size and pressure rating. One side of the blade is machined to mate with another flange. The other side features a tapered hub with a weld bevel prepared for connection to a pipe of a matching diameter.

To connect the flange to the pipe, a single circumferential weld is required. This butt weld is a high-integrity weld that can be visually inspected or subjected to non-destructive examinations. Additionally, it undergoes a hydrostatic test.

Weld neck flanges are typically machined from forgings. This provides a more consistent grain properties throughout the component’s body. Despite their higher cost, weld neck flanges are a preferred method of jointing, especially under high-pressure, high-temperature, and cyclic loading conditions. They are also commonly used in applications with lower pressures and temperatures.

7.2 Socket-Weld Flange

The socket weld flange are produced according to standard dimensions outlined by ASME B16.5. This flange consists of a drilled flanged blade with a machined face on one side and a female socket on the other side into which the pipe is inserted. Similar to weld neck flanges, socket weld flanges are typically made from forged steel. The flange and the pipe are joined together by a circumferential fillet weld. This is more economical than a butt weld. However, it is considered less effective, leading to its general use in sizes 2 inches and below. It is used at ambient and intermediate temperatures, and within ASME B16.5 classes 150 lb and 300 lb.

It’s important to note that the use of socket weld flanges in process systems are limited to utility piping systems, air, and water. This limitation is often due to considerations of joint effectiveness and the specific requirements of the system.

7.3 Screwed Flange

Screwed and socket weld flanges share very similar construction features. However, in screwed flanges, instead of having a socket bored into the forging, an NPT (National Pipe Taper) thread is tapped. This allows a pipe with a matching male thread to be screwed into the flange. Since this joint does not require welding, it is both more cost-effective and quicker to execute compared to butt and socket welds.

It’s important to note that the screwed joint is the least efficient and is primarily used for utility piping systems. Due to the absence of welding, non-destructive examination (NDE) is limited to visual inspections. Visual inspection is followed by a hydrostatic test. In the event of a leak, the system can be shut down and the screwed connection can be back welded. This will effectively convert it into a socket weld flange. This conversion allows for a more secure and reliable joint.

7.4 Slip-On Flange

A slip-on flange is essentially a drilled flange blade with a bored hole. In this type of flange, the pipe is inserted into the flange before the welding process. The connection between the pipe and the flange is established by either one external circumferential fillet weld or two fillet welds, one external and one internal against the flange face.

This method of jointing is generally more economical than a weld neck flange, especially at smaller sizes. However, it comes with a trade-off as it lacks mechanical strength. Consequently, slip-on flanges are typically used for utility piping classes operating at ambient temperatures and lower pressures. The relevant codes for this type of joint are often ASME 150 lb and 300 lb.

7.5 Lap-Joint Flange

A lap-joint flange consists of two piping components for each side of the flanged connection: a stub end and a loose backing flange. The stub end is butt-welded to the pipe, and the loose backing flange fits over the outside diameter of the stub end. Unlike other flange types, the backing flange is not welded to the pipe. It has the flexibility to be rotated which proves useful during the erection process.

While this method of jointing is not as robust as a weld neck flange, it surpasses screwed, socket weld, and slip-on connections in terms of strength. However, it tends to be more expensive. It requires a full-penetration butt weld and two separate components.

Knowledge Hub